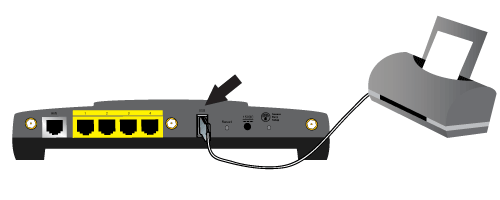
Disconnect the printer from your computer and Plug the thin rectangular end of the USB cable into the USB port on the router.
A USB printer can be connected to the router and used as a network printer if you are using an operating system that supports printing to an Internet Printing Protocol (IPP)-based printer. Macintosh OS X 10.3 and later has built-in support for this function.
Note: If the printer has already been installed on every computer that will use it once it is on the network, skip to Step Two: Get Your Print Server Information.
Before connecting your printer to the print server, it is important to install the drivers provided by the printer manufacturer on each computer that will use the printer.
Plug your USB printer into one of the USB ports on your computer.
Install the printer by following the installation instructions included with your printer.
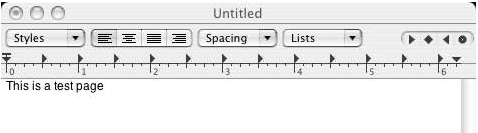
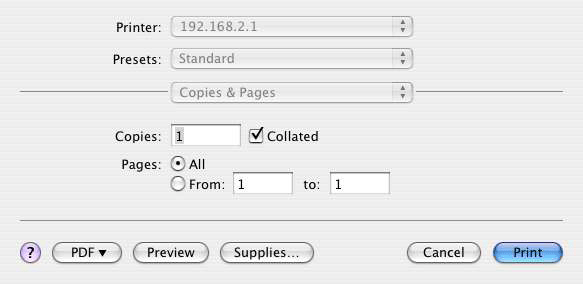
Print a test page to ensure that the printer is working properly.
Power off your printer.
Disconnect the printer from your computer and Plug the thin rectangular end of the USB cable into the USB port on the router.
Connect the power supply to your printer and turn your printer on.
Start a Web browser. In the location or address line type 192.168.2.1 and press ENTER.
Note: If you have modified your router's IP address, enter the new IP address instead of 192.168.2.1.
When the user name and password window appears, type in the user name and the password you created. Click OK to load the router's setup page.
Note: You are not prompted to log in the first time you connect to the router configuration pages. During the Setup Wizard procedure, you created a user name and password to log on to the router. You will need to use these whenever you log on to the router. The user name and password are case-sensitive.
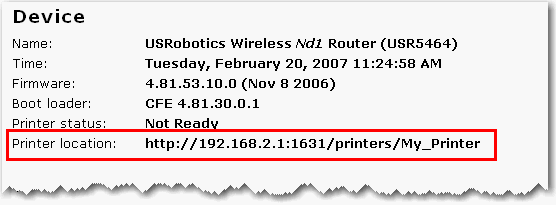
In the Device section of the Status page, look for the Printer status and Printer location information. Write down the Printer location address. You need the address to set up the printer on computers that are connected to your network that you want to have access to the printer.
Note: You must perform this procedure on each computer on your network to allow printing using the print server on the router.
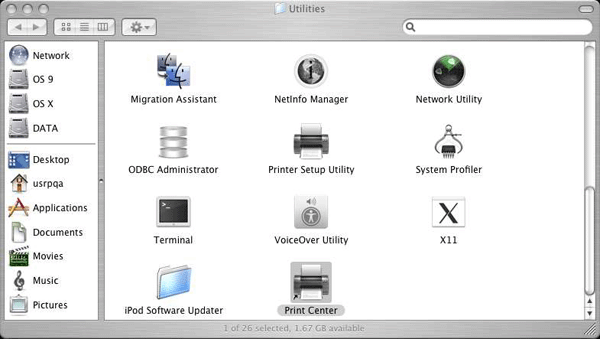
Open Utilities and double click Print Center.
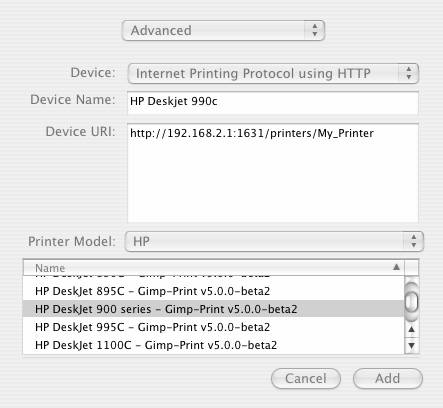
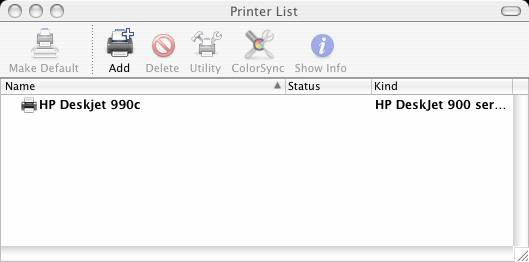
Hold down the Alt/Option key and click Add.

Select Advanced and select or enter the values shown below:
Device: Internet Printing Protocol using HTTP
Device Name: HP Deskjet 990c (example only, select your printer)
Device URI: http://192.168.2.1:1631/printers/My_Printer
Note: The Device URI information is case-sensitive and must be entered exactly as it is listed on the Printer location section on the router's Status page. If you have modified the IP address of your router, then use your router's IP address in place of 192.168.2.1.
Note: If you do not see your printer manufacturer or model listed contact the manufacturer to obtain an IPP compatible PostScript Printer Description (PPD) file for the Macintosh.
Note: If you do not see the screen shown above hold down the Alt/Option key and click More Printers...

With the printer selected, click Make Default.
Open Applications and double click TextEdit to create a printer test page.
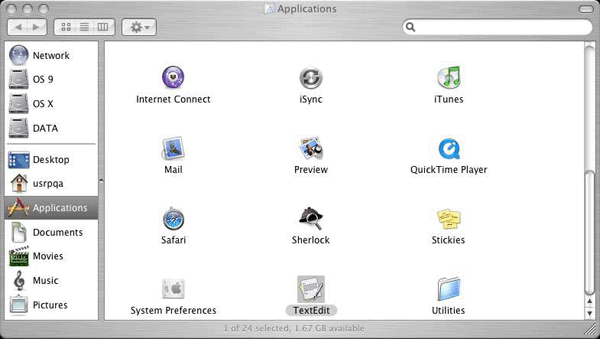
Enter some text.